
MailStack | Self-Hosted Email Marketing Platform
Professional documentation for installing, configuring, and using MailStack — a self-hosted email marketing platform. It combines a Livewire-powered admin panel with a full REST API for contact management, email campaigns, segmentation, mail gateway control, and permission-based operations.
1. Introduction
MailStack is a self-hosted email marketing platform built for businesses, agencies, SaaS teams, and internal marketing departments that need full control over their contacts, campaign delivery, segmentation, templates, and gateway management. It provides both a web-based administration panel and a full REST API, making it suitable for non-technical operators, developers integrating external systems, and teams shipping a companion mobile app.
Admin Panel
Livewire-based admin experience for daily campaign, contact, and gateway operations.
REST API
Sanctum-protected API for the MailStack Flutter companion app, custom apps, CRMs, and automation tools.
Operational Control
Role permissions, activity logs, notifications, blocklist management, and settings control.
Who It's For
- ✓ Marketing agencies managing multiple audiences
- ✓ Businesses sending newsletters and promotional campaigns
- ✓ Developer teams needing API-driven campaign automation
- ✓ Owners, admins, staff, and customers using the companion mobile app
- ✓ Teams requiring role-based access and delivery visibility
Core Stack
- • Laravel 12 + Livewire + Laravel Sanctum
- • Spatie Permissions, MediaLibrary, ActivityLog
- • Laravel Fortify and Laravel Setting
- • mPDF for export / PDF generation workflows
2. Requirements
Make sure your server or hosting account meets the following requirements before starting the installation.
Server Requirements
- ✓ PHP 8.2 or higher
- ✓ MySQL 8.0+ or MariaDB 10.6+
- ✓ Apache or Nginx with URL rewriting enabled
- ✓ HTTPS / SSL certificate for production use
- ✓ Cron access for scheduler and queue handling
Developer Tools
- ✓ Composer 2.x
- ✓ Node.js 18+ and npm 9+
- ✓ SSH or terminal access recommended
- ✓ Ability to run long-lived queue workers on VPS
- ✓ cPanel terminal access if installing on shared hosting
Required PHP Extensions
3. VPS Server Setup
If you are deploying MailStack on a VPS or dedicated server, prepare the server first before uploading the application. The example below assumes Ubuntu 22.04 or 24.04 with a fresh server.
Step 1. Update the server
sudo apt update
sudo apt upgrade -y
Step 2. Install Nginx
sudo apt install -y nginx
sudo systemctl enable nginx
sudo systemctl start nginx
Step 3. Install MySQL
sudo apt install -y mysql-server
sudo systemctl enable mysql
sudo systemctl start mysql
sudo mysql_secure_installation
Create the application database and user:
sudo mysql -u root -p

CREATE DATABASE mailstack CHARACTER SET utf8mb4 COLLATE utf8mb4_unicode_ci;
CREATE USER 'mailstack_user'@'localhost' IDENTIFIED BY 'StrongPassword123!';
GRANT ALL PRIVILEGES ON mailstack.* TO 'mailstack_user'@'localhost';
FLUSH PRIVILEGES;
EXIT;
Step 4. Install PHP and required extensions
sudo apt install -y software-properties-common
sudo add-apt-repository ppa:ondrej/php -y
sudo apt update
sudo apt install -y php8.3 php8.3-fpm php8.3-cli php8.3-mysql php8.3-mbstring \
php8.3-xml php8.3-curl php8.3-bcmath php8.3-zip php8.3-gd php8.3-intl

sudo systemctl enable php8.3-fpm
sudo systemctl start php8.3-fpm
Step 5. Install Composer
cd /tmp
curl -sS https://getcomposer.org/installer | php
sudo mv composer.phar /usr/local/bin/composer
composer --version
Step 6. Install Node.js and npm
curl -fsSL https://deb.nodesource.com/setup_20.x | sudo -E bash -
sudo apt install -y nodejs
node -v
npm -v
Node.js is required to build the frontend assets used by the Livewire and Laravel interface.
Step 7. Upload the project and install dependencies
cd /var/www
sudo mkdir -p mailstack
sudo chown $USER:$USER mailstack
cd mailstack

# Upload and extract the project files here

composer install --optimize-autoloader --no-dev
npm install
npm run build
Step 8. Configure the environment file
APP_NAME="MailStack"
APP_ENV=production
APP_DEBUG=false
APP_URL=https://yourdomain.com

DB_CONNECTION=mysql
DB_HOST=127.0.0.1
DB_PORT=3306
DB_DATABASE=mailstack
DB_USERNAME=mailstack_user
DB_PASSWORD=StrongPassword123!

QUEUE_CONNECTION=database
SESSION_DRIVER=database
CACHE_STORE=file
Step 9. Run Laravel setup commands
php artisan key:generate
php artisan migrate --seed
php artisan storage:link
php artisan queue:table
php artisan failed:table
php artisan migrate
chmod -R 775 storage bootstrap/cache
php artisan config:cache
php artisan route:cache
php artisan view:cache
Step 10. Configure Nginx virtual host
Create an Nginx site configuration for your domain:
sudo nano /etc/nginx/sites-available/mailstackserver {
listen 80;
server_name yourdomain.com www.yourdomain.com;
root /var/www/mailstack/public;
index index.php index.html;
add_header X-Frame-Options "SAMEORIGIN";
add_header X-Content-Type-Options "nosniff";
location / {
try_files $uri $uri/ /index.php?$query_string;
}
location ~ \.php$ {
include snippets/fastcgi-php.conf;
fastcgi_pass unix:/var/run/php/php8.3-fpm.sock;
}
location ~ /\.ht {
deny all;
}
}Enable the site:
sudo ln -s /etc/nginx/sites-available/mailstack /etc/nginx/sites-enabled/
sudo nginx -t
sudo systemctl reload nginx
Step 11. Configure the queue worker with Supervisor
sudo apt install -y supervisorCreate the worker configuration:
sudo nano /etc/supervisor/conf.d/mailstack-worker.conf[program:mailstack-worker]
process_name=%(program_name)s_%(process_num)02d
command=php /var/www/mailstack/artisan queue:work --sleep=3 --tries=3 --timeout=120
autostart=true
autorestart=true
user=www-data
numprocs=1
redirect_stderr=true
stdout_logfile=/var/www/mailstack/storage/logs/worker.logsudo supervisorctl reread
sudo supervisorctl update
sudo supervisorctl start mailstack-worker:*Step 12. Add the Laravel scheduler cron job
crontab -e* * * * * php /var/www/mailstack/artisan schedule:run >> /dev/null 2>&1Step 13. Install SSL with Certbot
sudo apt install -y certbot python3-certbot-nginx
sudo certbot --nginx -d yourdomain.com -d www.yourdomain.com
Test renewal:
sudo certbot renew --dry-runUseful maintenance commands
php artisan optimize:clear
php artisan queue:work
sudo supervisorctl status
sudo systemctl status nginx
sudo systemctl status php8.3-fpm
sudo systemctl status mysql4. Installation
Follow the steps below in order. These instructions work for VPS, dedicated servers, and hosting accounts that provide terminal access.
Installation Screens
Click any image to open full size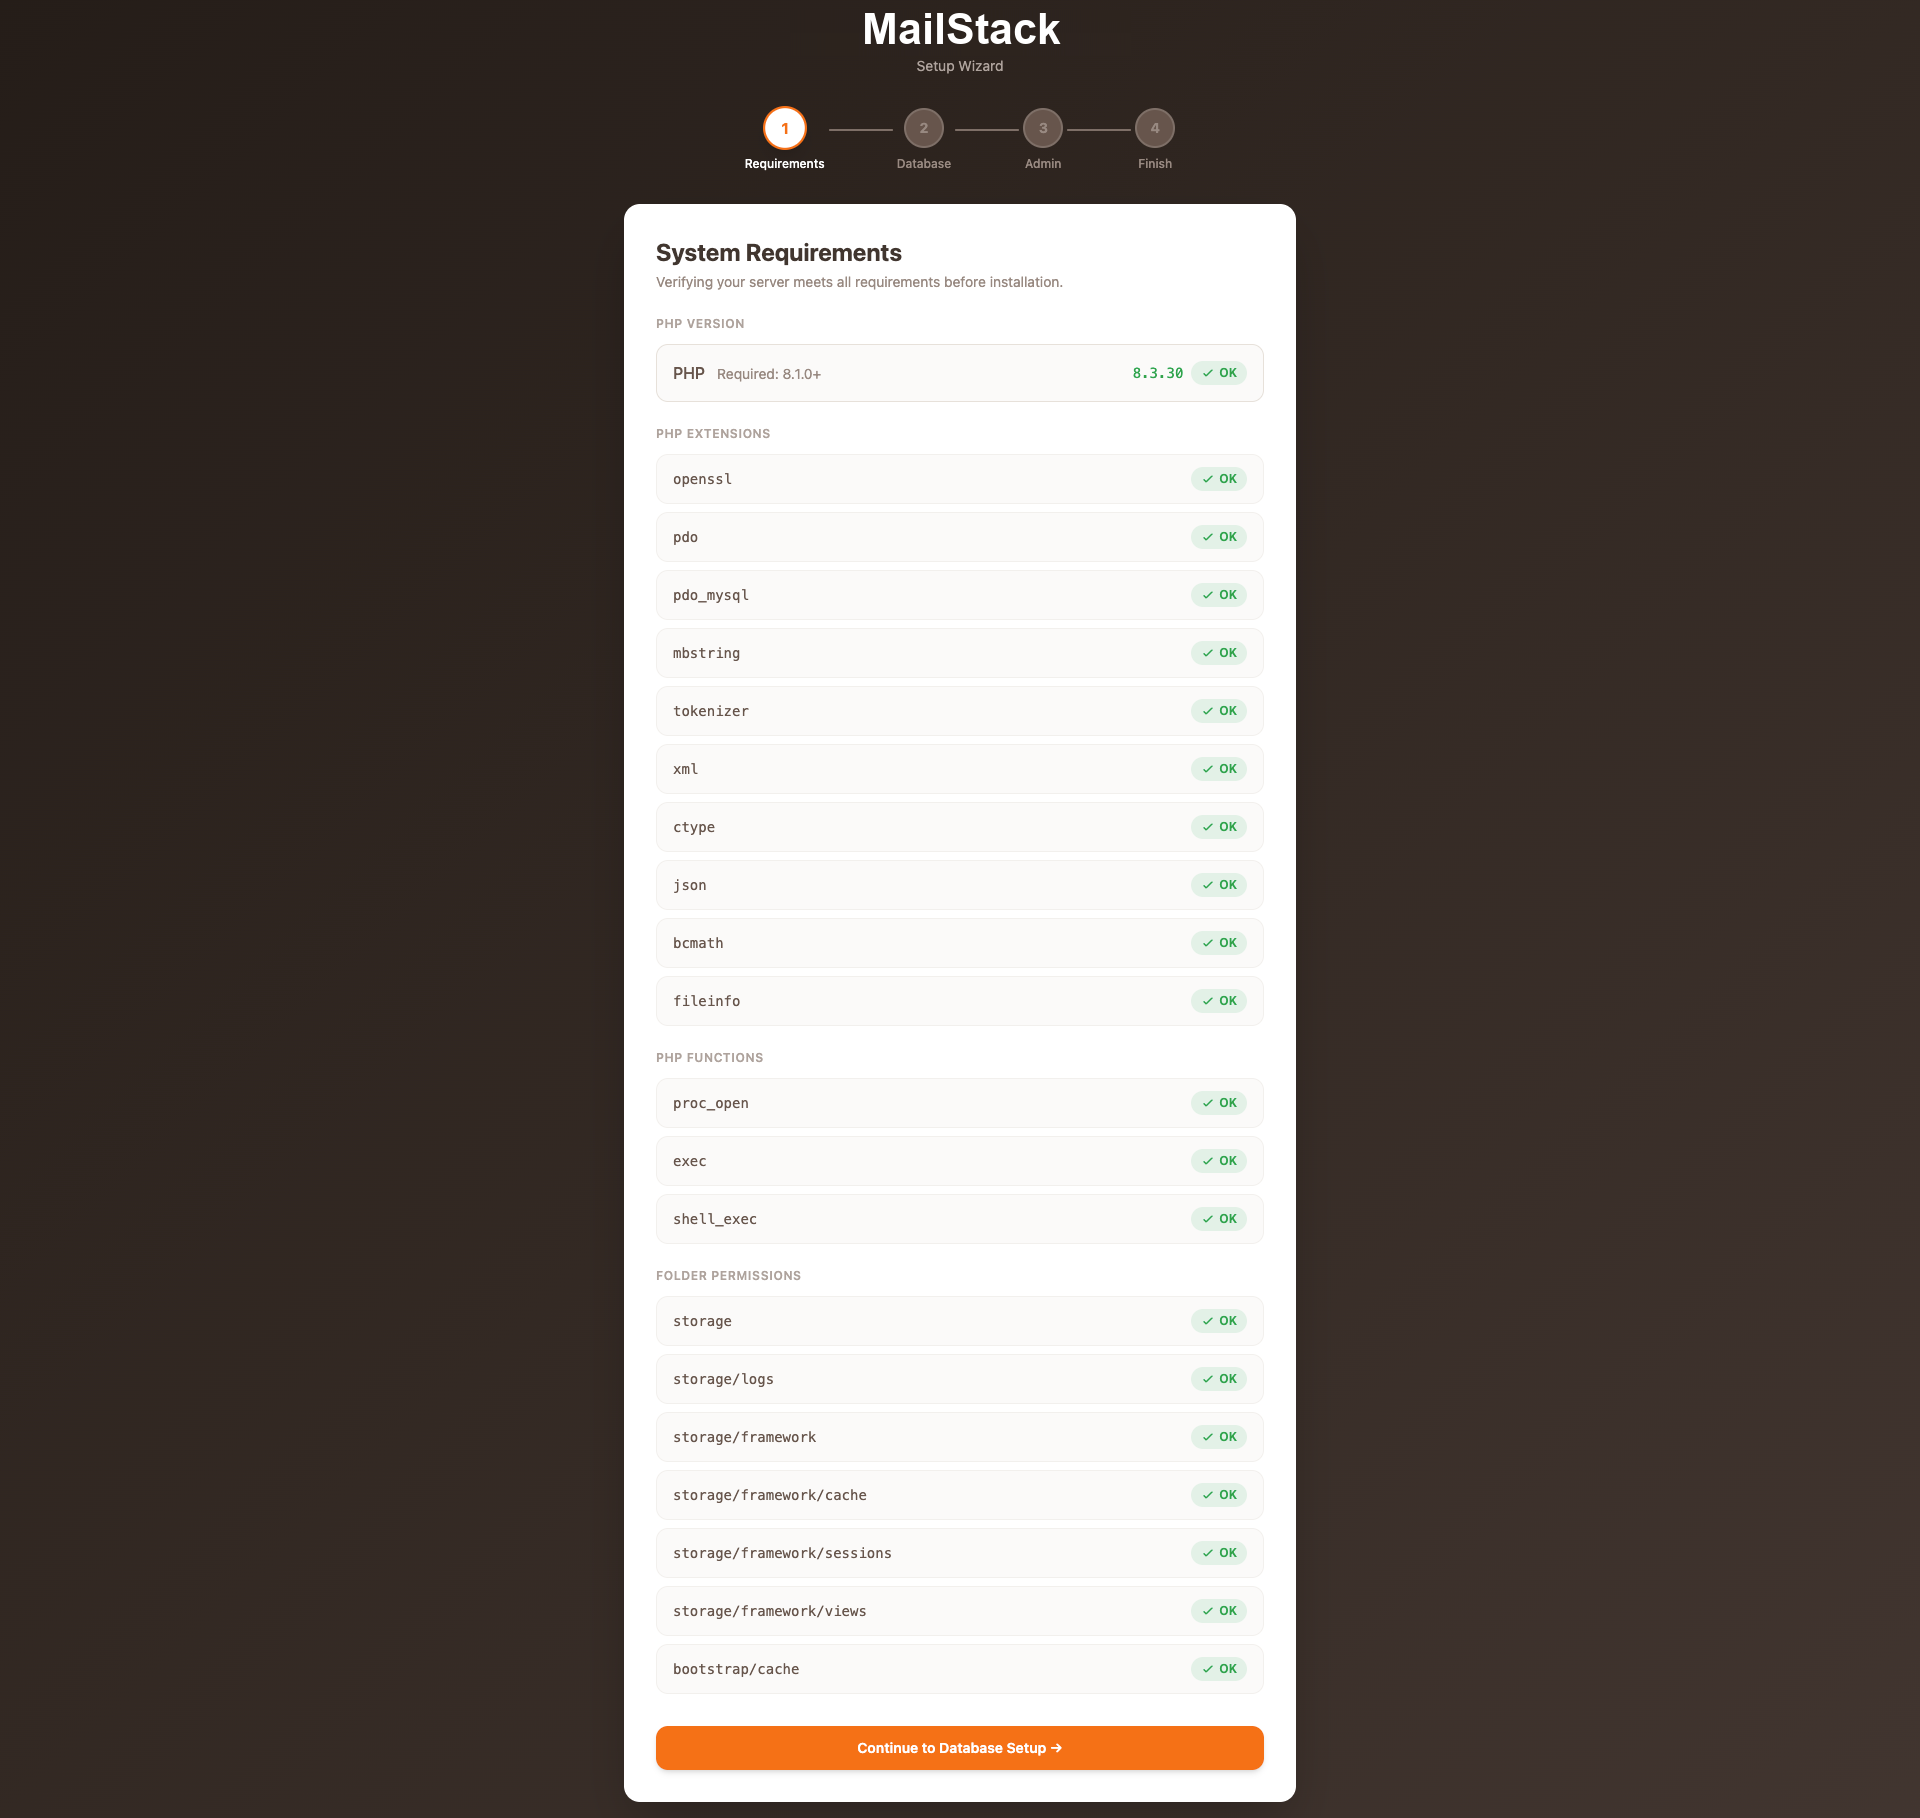
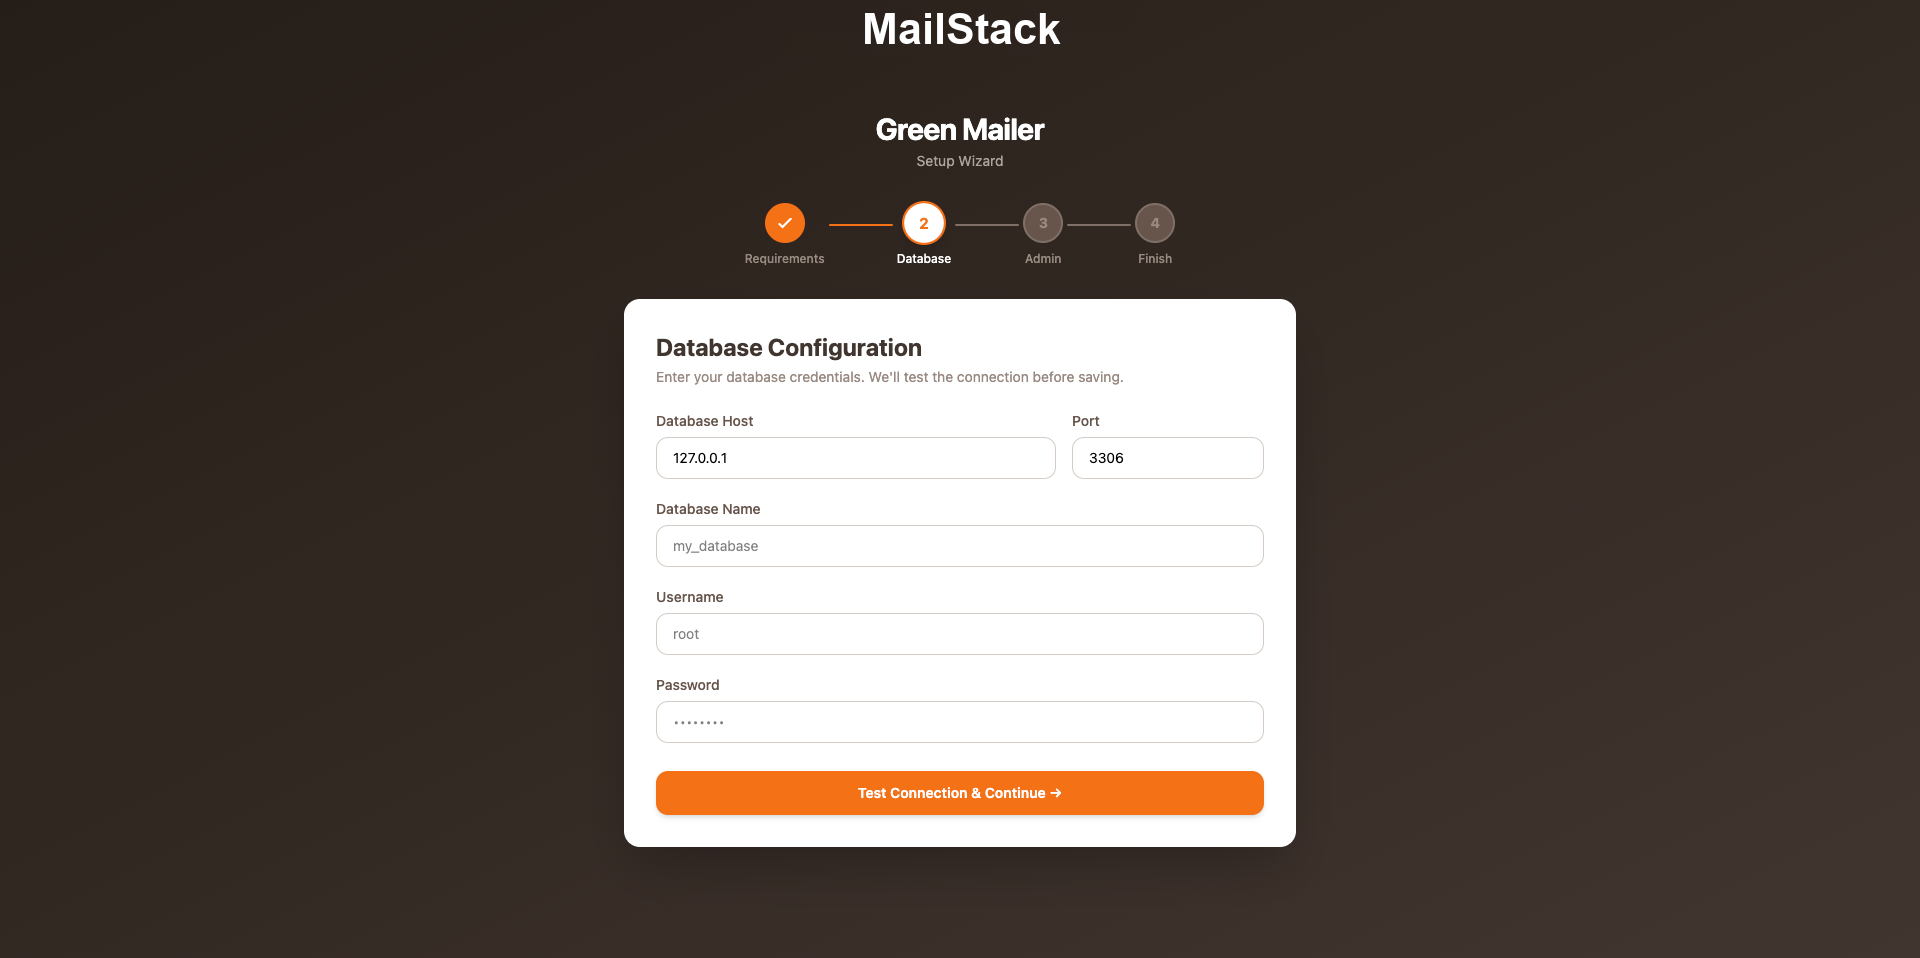
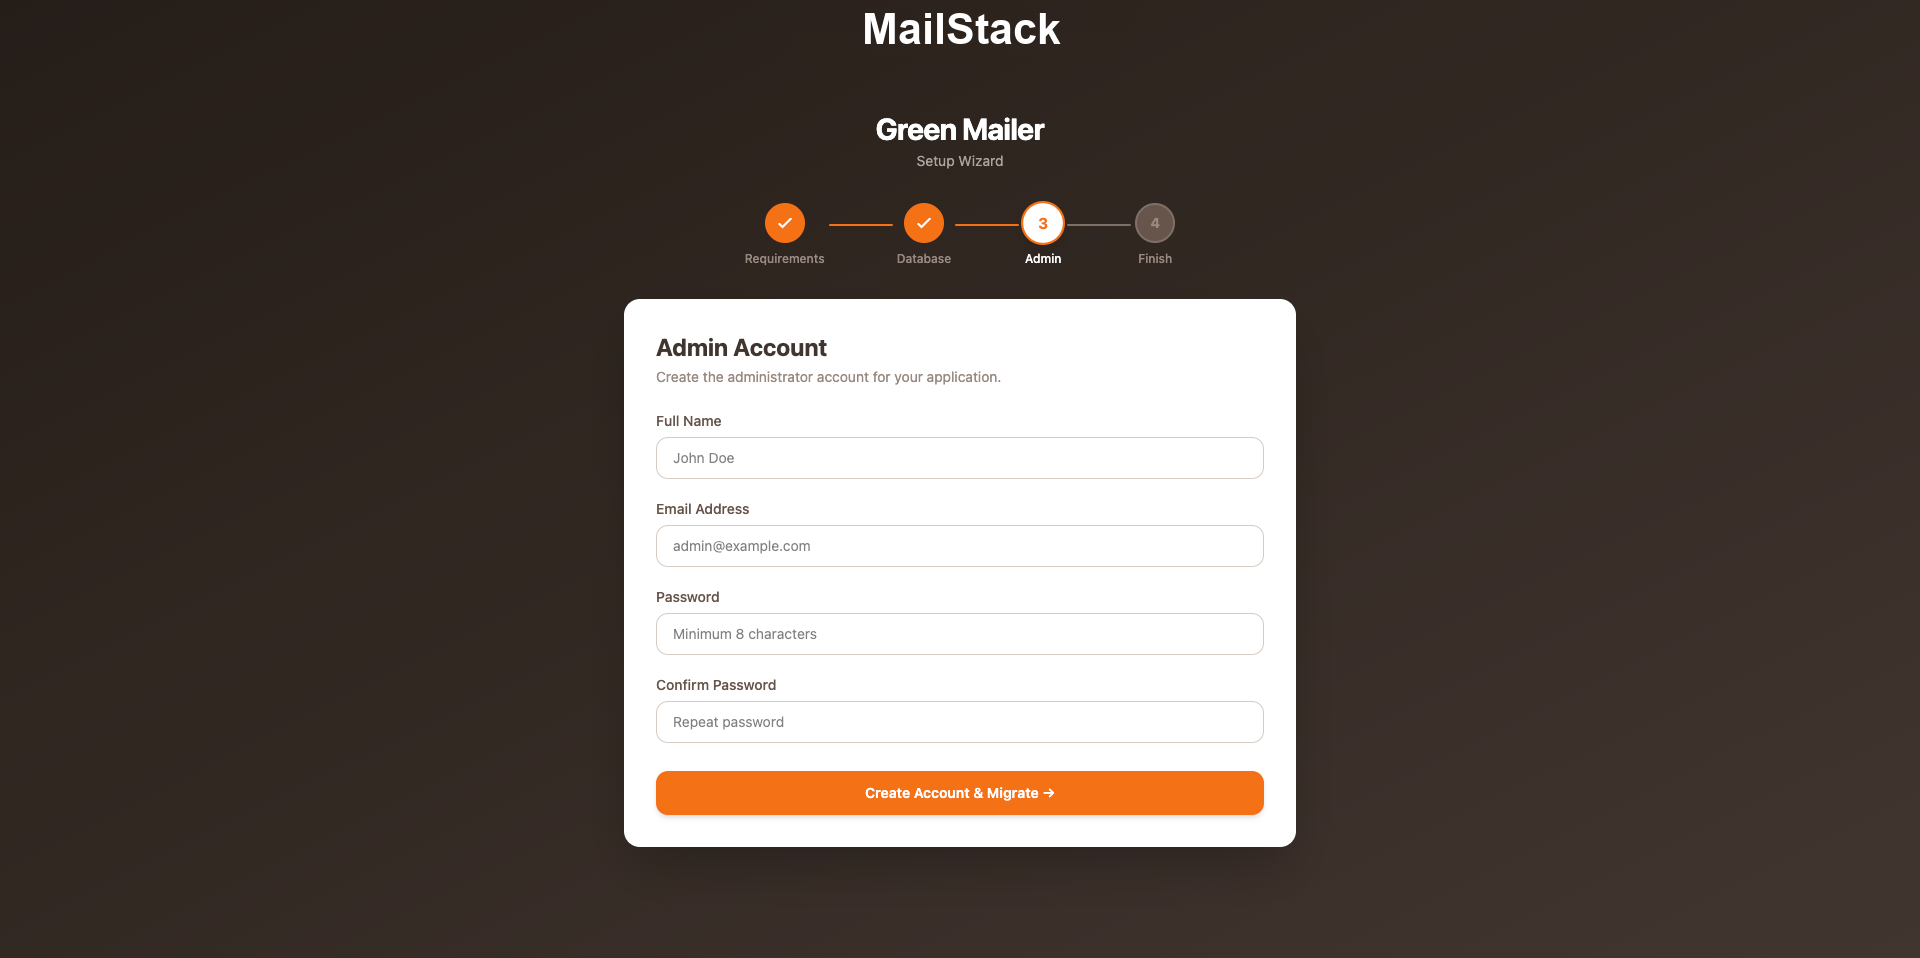
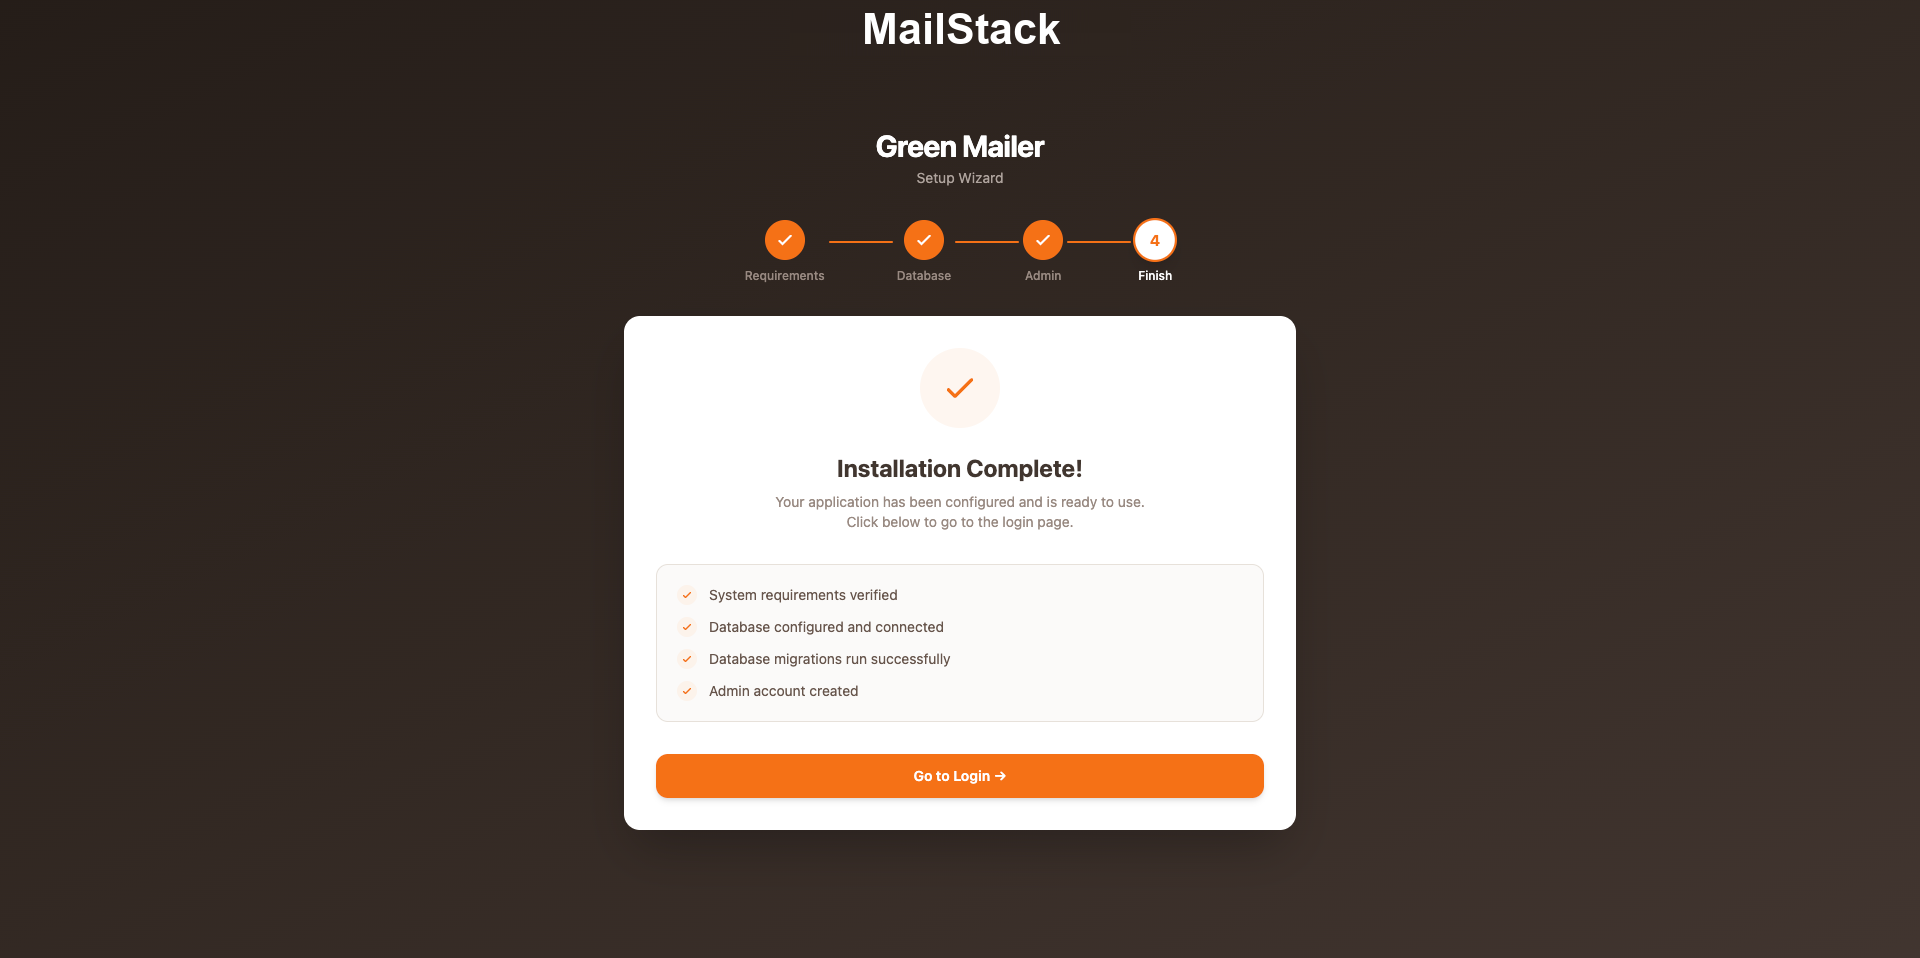
Step 1. Upload or extract the project files
Upload the MailStack source package to your server, then extract it inside your target directory.
cd /var/www
unzip mailstack.zip -d mailstack
cd mailstack
If you use cPanel, upload the ZIP with File Manager, extract it, then open Terminal in the project directory.
Step 2. Create and update the environment file
cp .env.example .envEdit the .env file and update the application URL, database credentials, queue driver, and mail defaults.
APP_NAME="MailStack"
APP_ENV=production
APP_KEY=
APP_DEBUG=false
APP_URL=https://yourdomain.com

DB_CONNECTION=mysql
DB_HOST=127.0.0.1
DB_PORT=3306
DB_DATABASE=mailstack
DB_USERNAME=your_db_user
DB_PASSWORD=your_db_password

QUEUE_CONNECTION=database
CACHE_STORE=file
SESSION_DRIVER=database

MAIL_MAILER=smtp
MAIL_HOST=127.0.0.1
MAIL_PORT=2525
MAIL_USERNAME=null
MAIL_PASSWORD=null
MAIL_ENCRYPTION=tls
MAIL_FROM_ADDRESS="[email protected]"
MAIL_FROM_NAME="${APP_NAME}"
Step 3. Install PHP dependencies
composer install --optimize-autoloader --no-devStep 4. Generate the application key
php artisan key:generateStep 5. Install frontend dependencies and build assets
npm install
npm run build
Step 6. Run migrations and seed the initial data
php artisan migrate --seedThis prepares the database tables and inserts the default system data required by the application.
Step 7. Link the storage directory
php artisan storage:linkStep 8. Configure file permissions
chmod -R 775 storage bootstrap/cacheStep 9. Create queue tables if needed
If you are using the database queue driver, make sure the queue tables exist.
php artisan queue:table
php artisan failed:table
php artisan migrate
Step 10. Start the queue worker
Campaign delivery and background jobs depend on a running queue worker.
php artisan queue:work --tries=3Recommended Supervisor configuration for VPS:
[program:mailstack-worker]
process_name=%(program_name)s_%(process_num)02d
command=php /var/www/mailstack/artisan queue:work --sleep=3 --tries=3 --timeout=120
autostart=true
autorestart=true
stopasgroup=true
killasgroup=true
user=www-data
numprocs=1
redirect_stderr=true
stdout_logfile=/var/www/mailstack/storage/logs/worker.log
Step 11. Add the Laravel scheduler cron
* * * * * php /var/www/mailstack/artisan schedule:run >> /dev/null 2>&1Shared hosting note: If your hosting panel supports URL-based cron jobs instead of shell commands, use your campaign dispatch endpoint with the required token query parameter. Example:
https://yourdomain.com/cron/campaigns/dispatch-scheduled?token=YOUR_CRON_TOKENReplace YOUR_CRON_TOKEN with the secure token configured by your application.
Step 12. Final optimization commands
php artisan config:cache
php artisan route:cache
php artisan view:cache5. Configuration
After installation, log in to the admin panel and review the main settings areas before creating production campaigns.
Mail Drivers
MailStack supports multiple mail providers. You can use system-level mail defaults in .env and manage gateway records from the admin interface.
- • SMTP for standard mail servers and third-party transactional email providers
- • Mailgun for API-based cloud delivery
- • Amazon SES for scalable transactional and campaign delivery
Queue Driver
For production, use a real asynchronous queue. The recommended drivers are:
- •
databasefor simple deployments - •
redisfor higher throughput environments
QUEUE_CONNECTION=databaseAdmin Settings Walkthrough
- Log in with the administrator account created during seeding or installation.
- Open Settings from the main sidebar.
- Configure basic site data such as application name, timezone, date format, default language, and branding assets.
- Review the mail configuration section and confirm the default sender name and sender email address.
- Configure the queue-related settings if the application exposes them in the settings panel.
- Review notification preferences and system email behavior.
- Save all changes, then send a test email from the mail gateway or campaign workflow.
6. Features Overview
Feature Screens
Click any image to open full size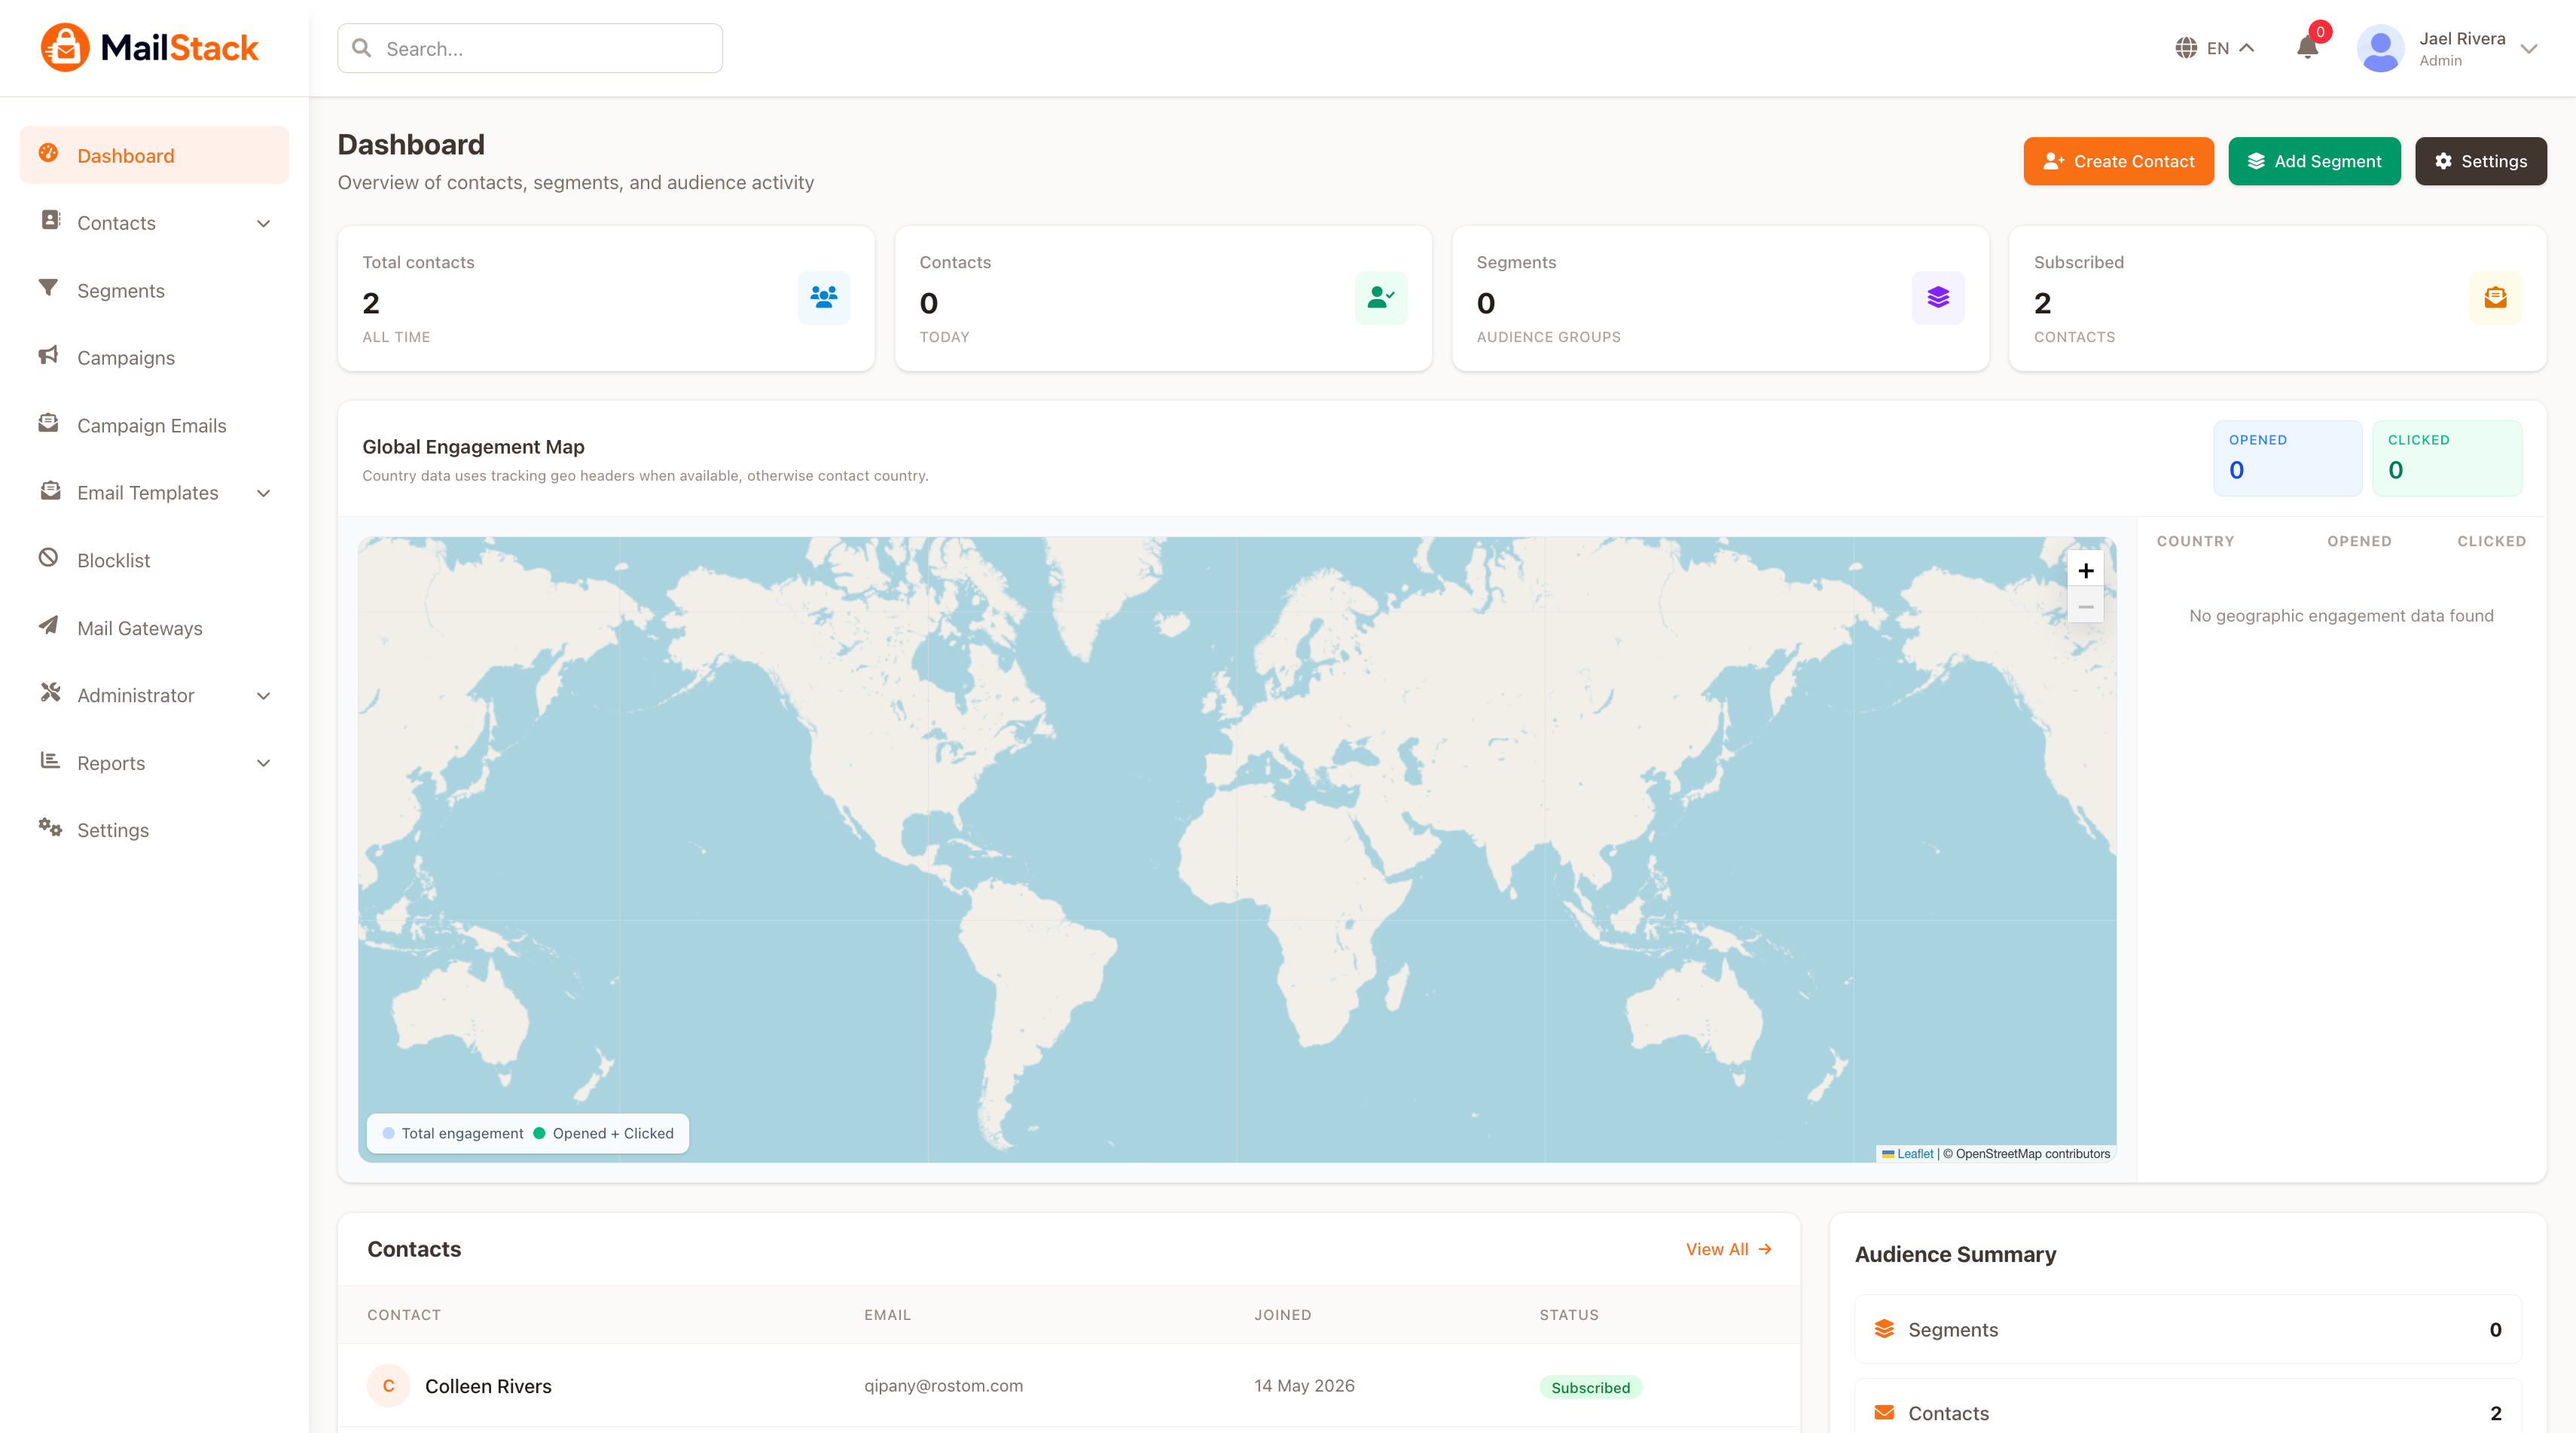
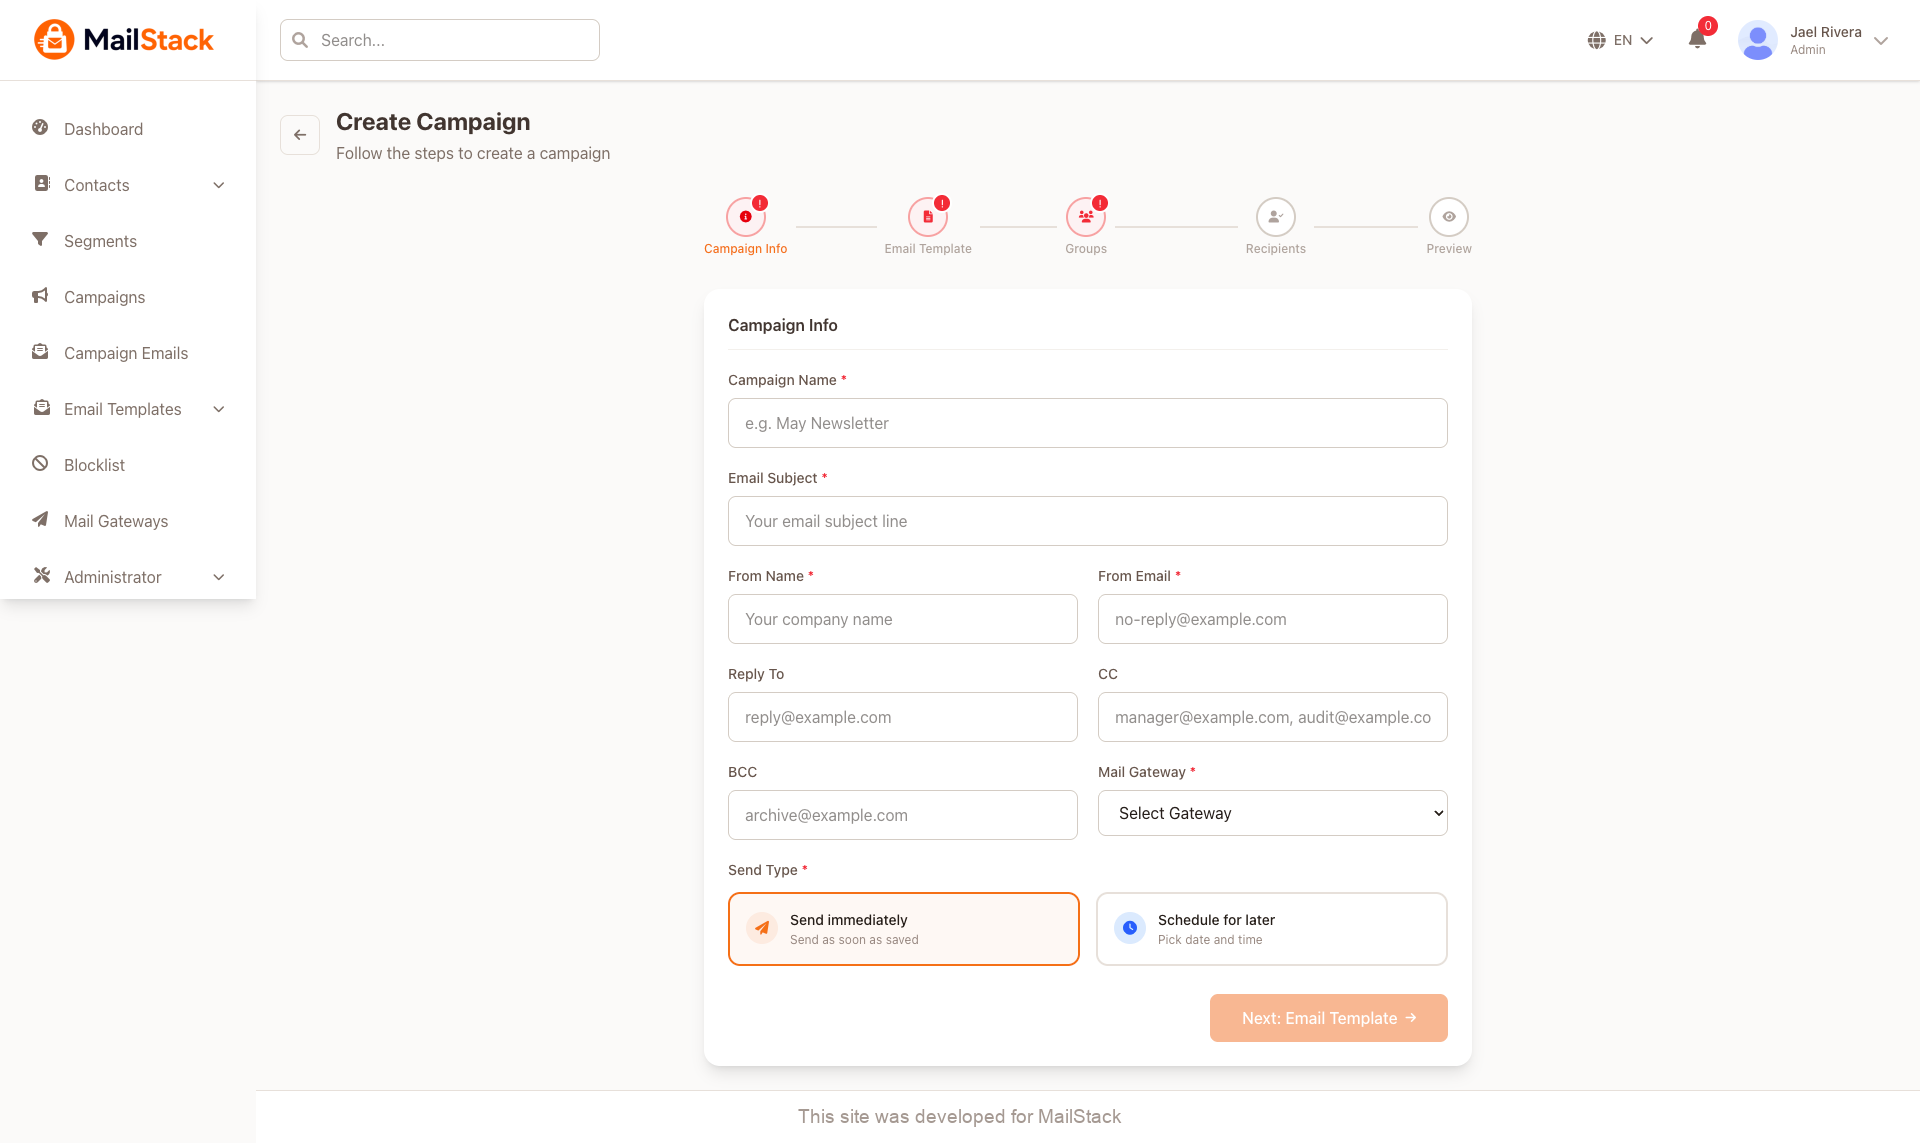
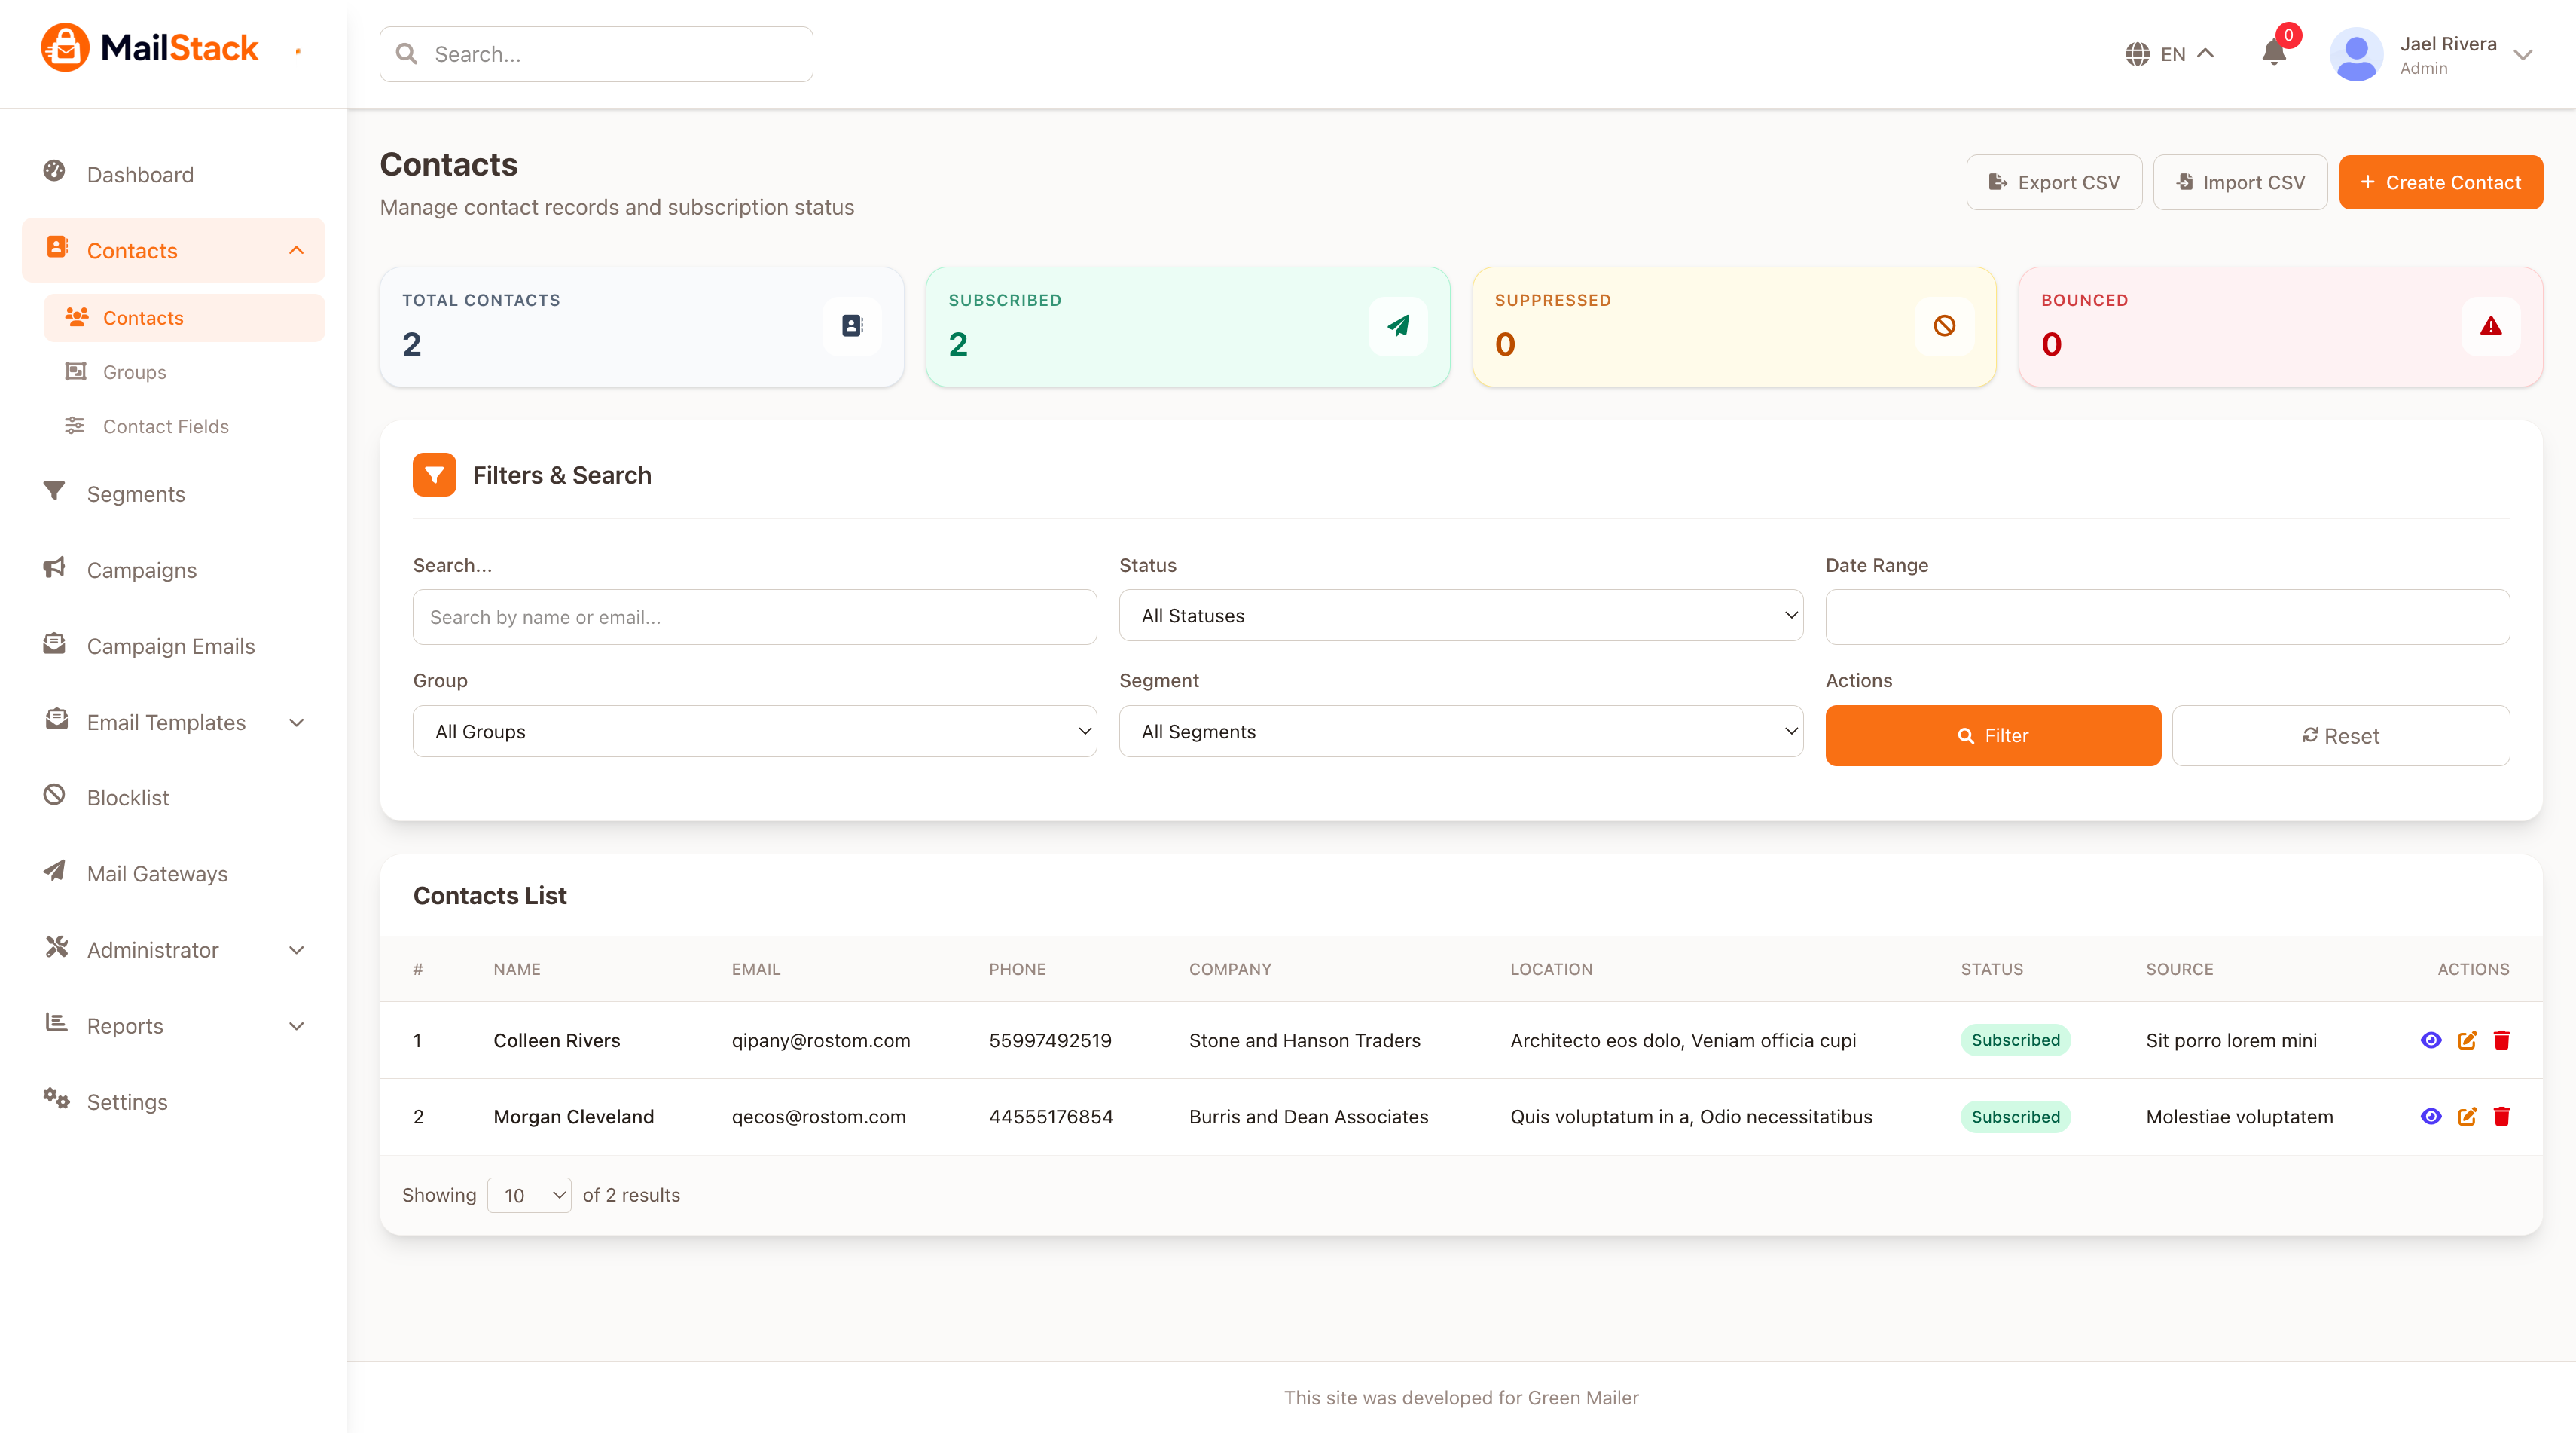
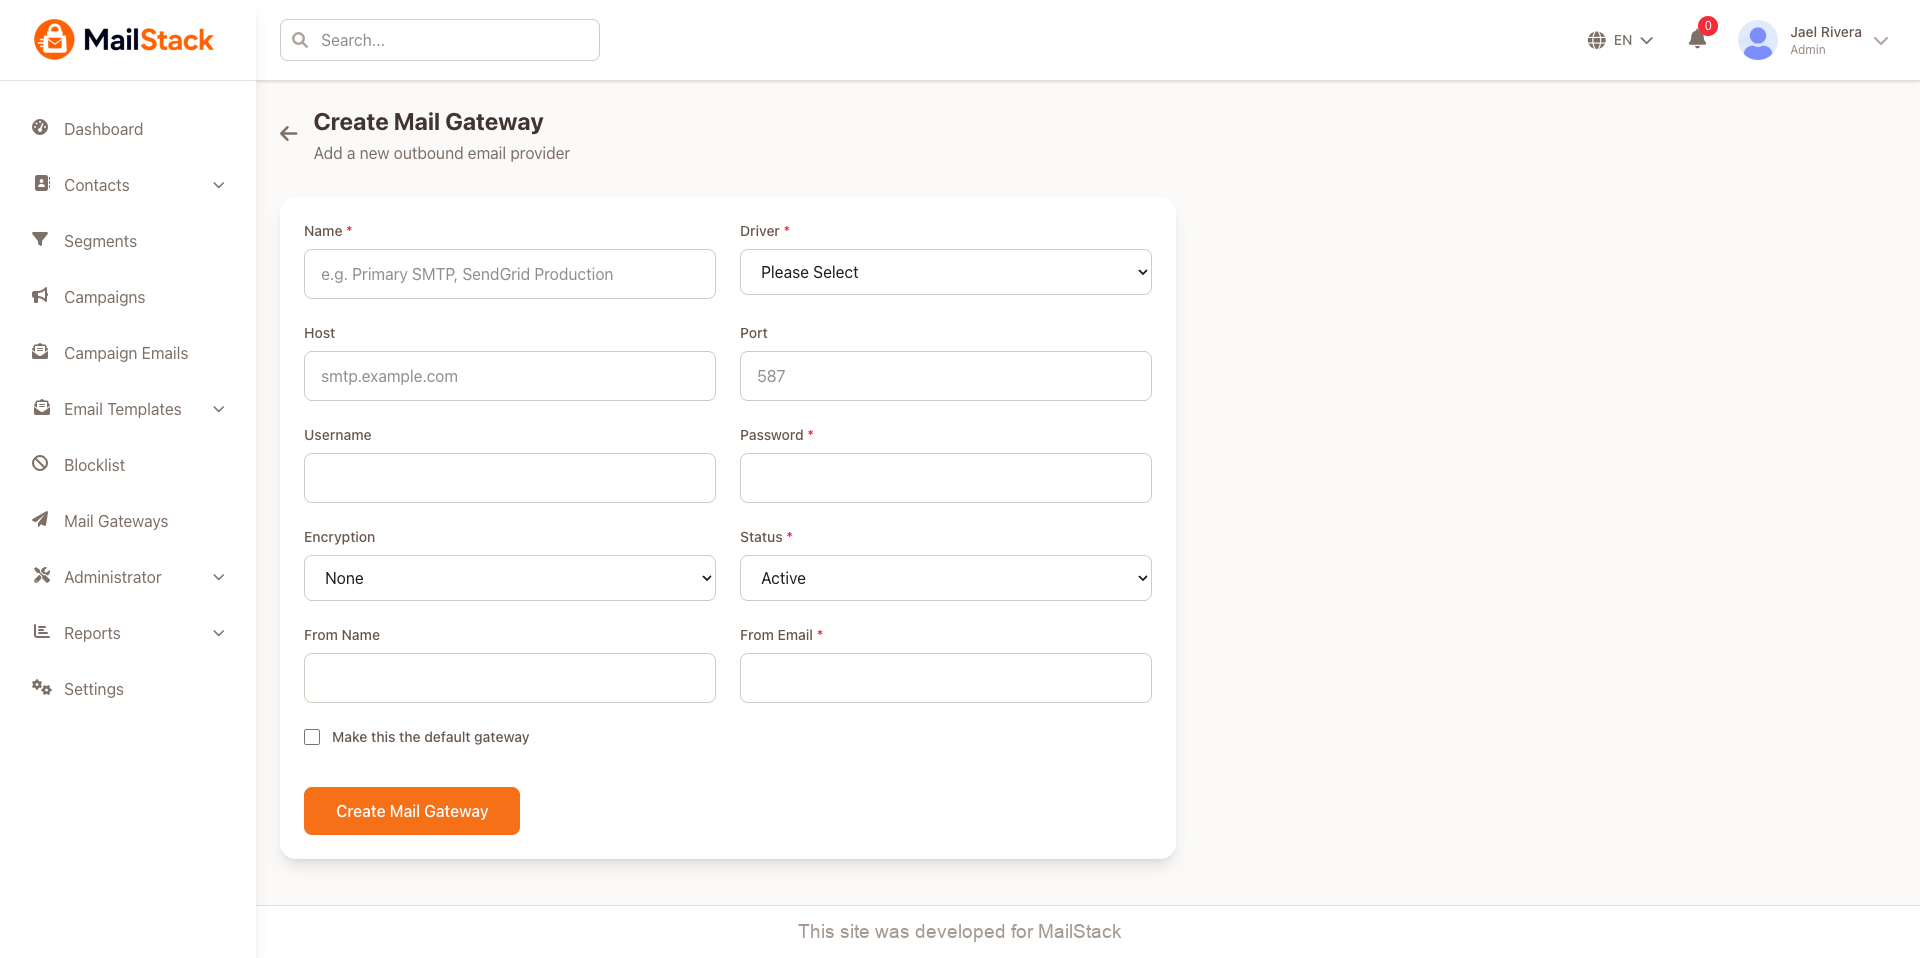
Campaigns
Create, edit, queue, test, and send email campaigns. Campaigns usually contain subject, sender identity, body content, scheduling or send options, and audience targeting rules.
Contacts
Store subscribers and customer records with fields such as name, email, status, tags, notes, and source information. Contacts are the base audience entity used by campaigns and segments.
Contact Groups
Organize contacts into reusable groups for campaigns, filtering, and administration. Groups help separate audiences by brand, event, client, or business unit.
Segments
Build rule-based dynamic audiences from contact attributes, engagement status, or grouped metadata. Segments are useful for targeted campaigns without manually moving contacts between lists.
Email Templates
Design reusable email layouts and campaign bodies. Templates reduce setup time and help maintain a consistent brand across multiple campaigns.
Mail Gateways
Register and manage multiple sending gateways such as SMTP, Mailgun, and Amazon SES. This is useful for deliverability separation, fallback routing, or client-specific sending accounts.
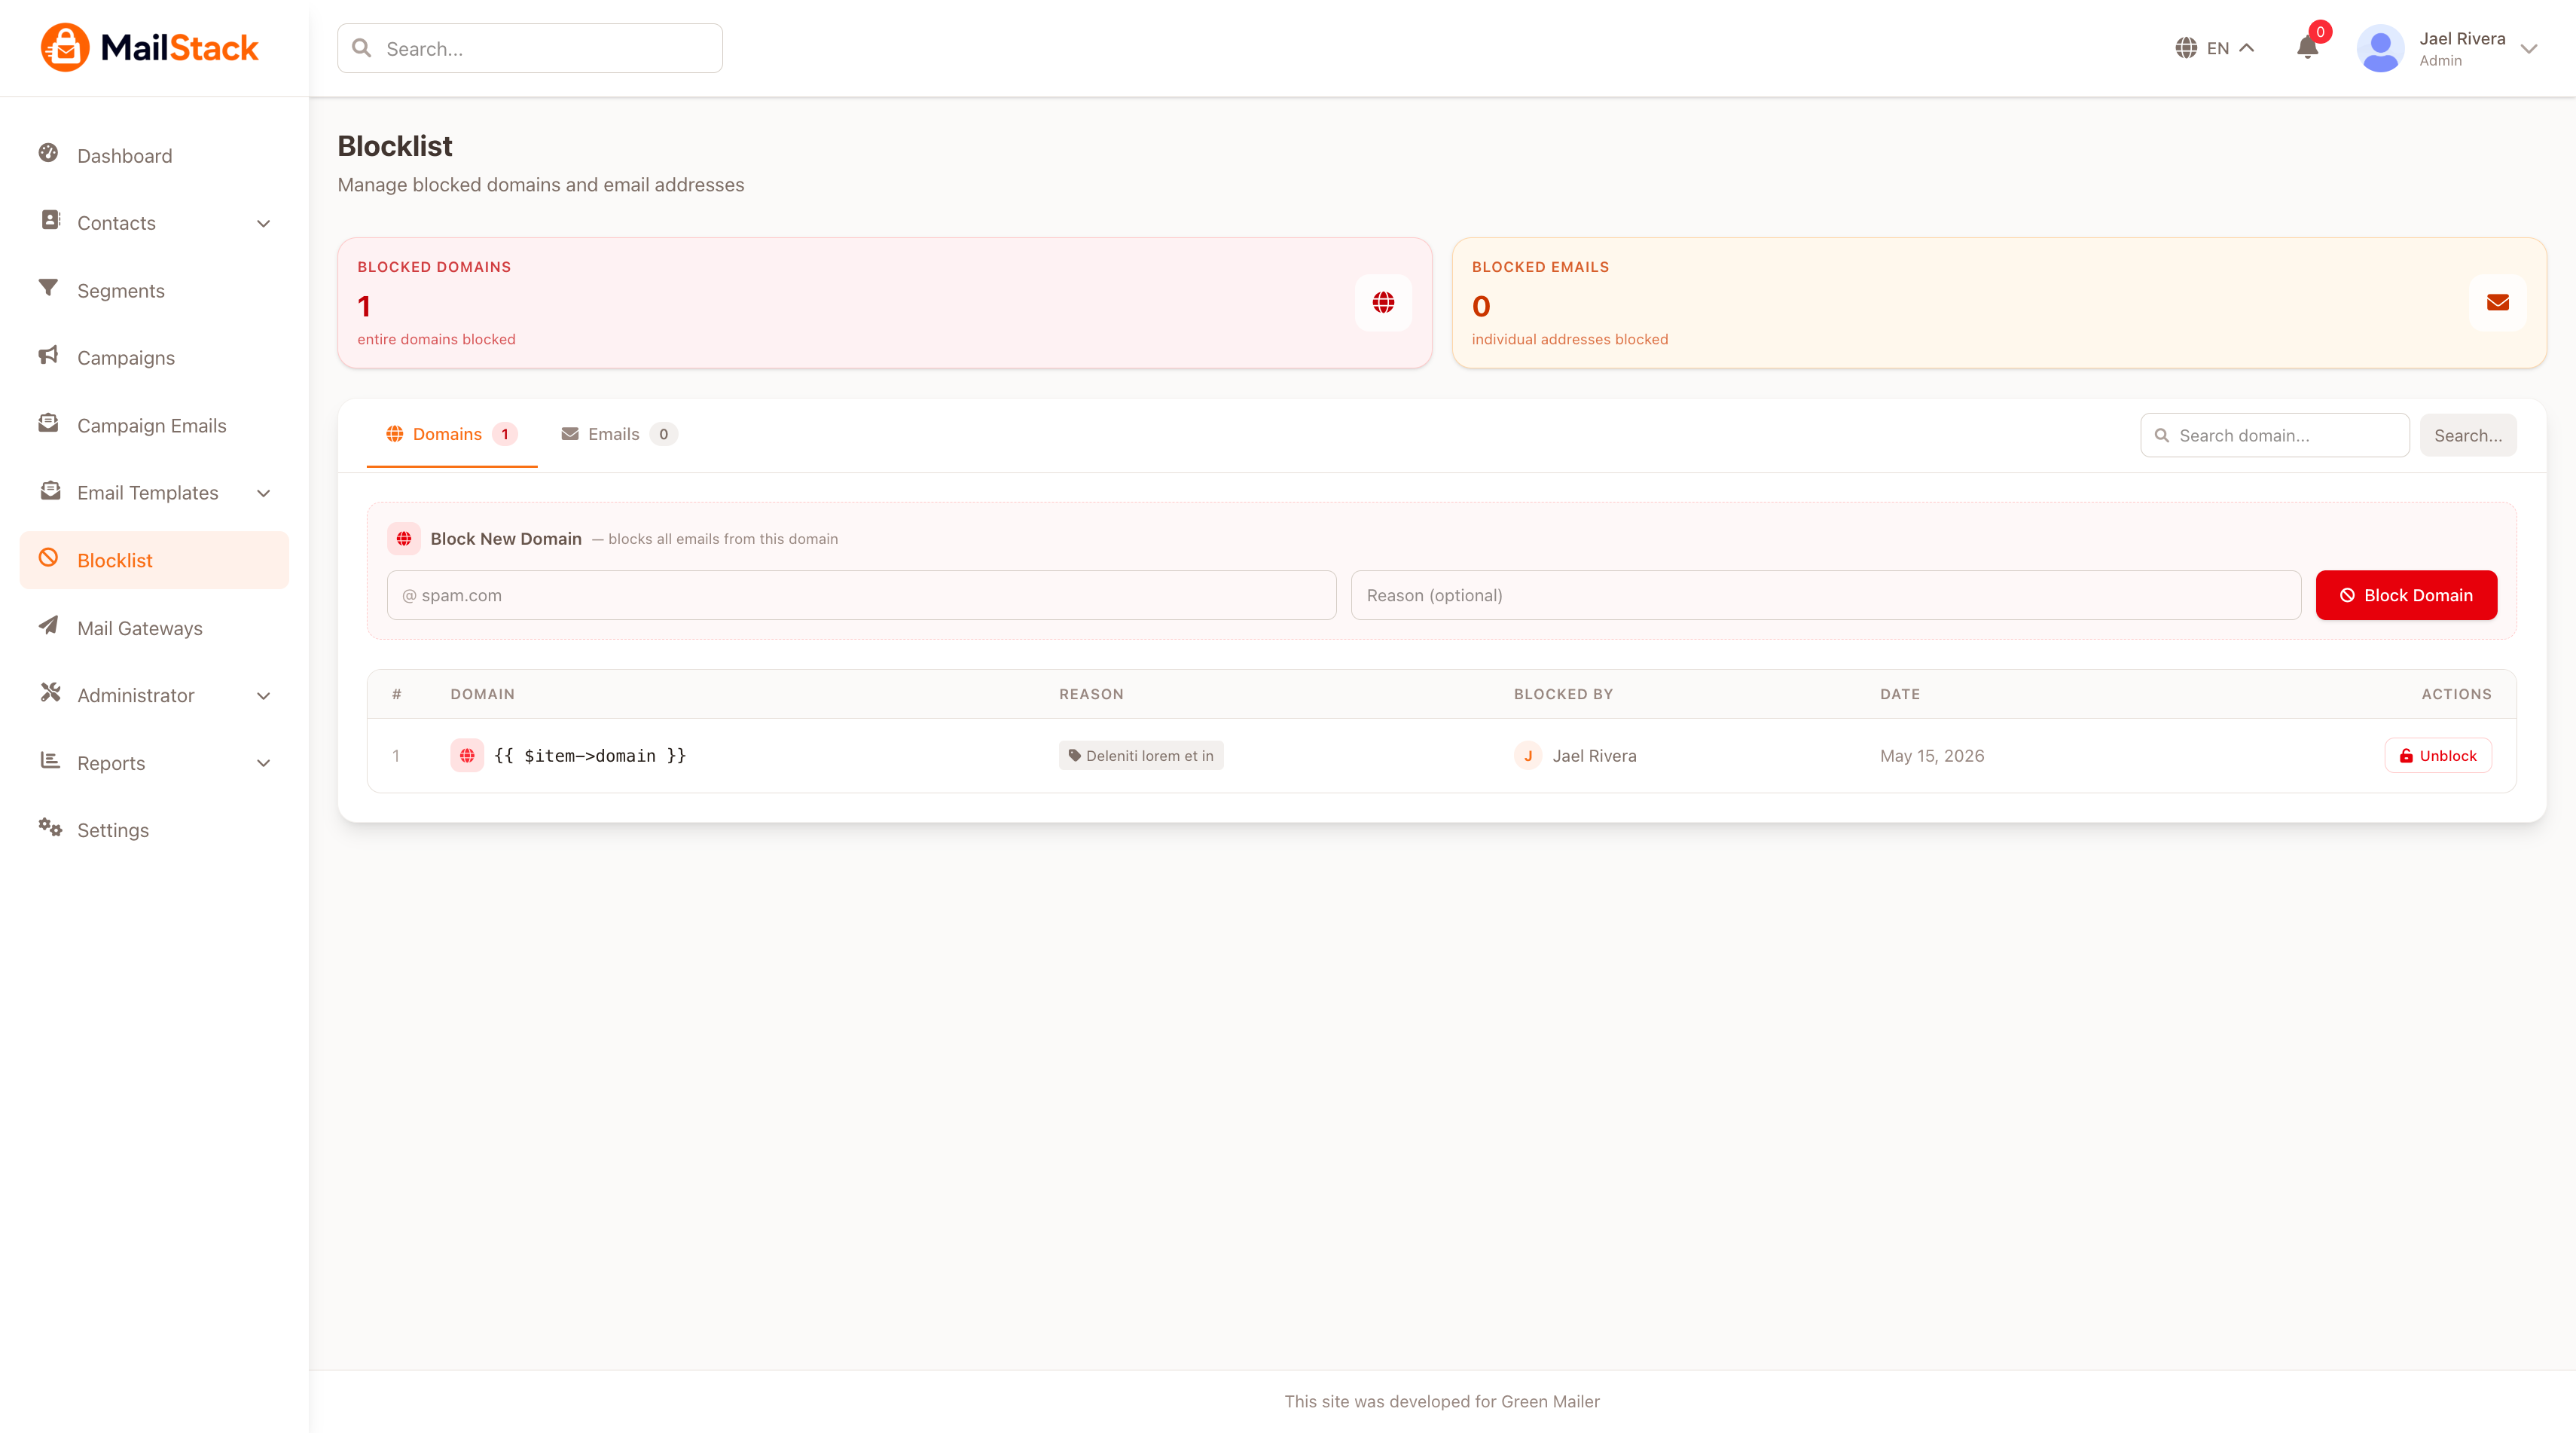
Blocklist
Prevent mail delivery to blocked or suppressed addresses. This helps reduce bounce risks and keeps campaign delivery cleaner over time.
Roles & Permissions
Control access to modules and actions using role-based authorization powered by Spatie Permissions. Administrators can create custom roles and limit team responsibilities safely.
Activity Log
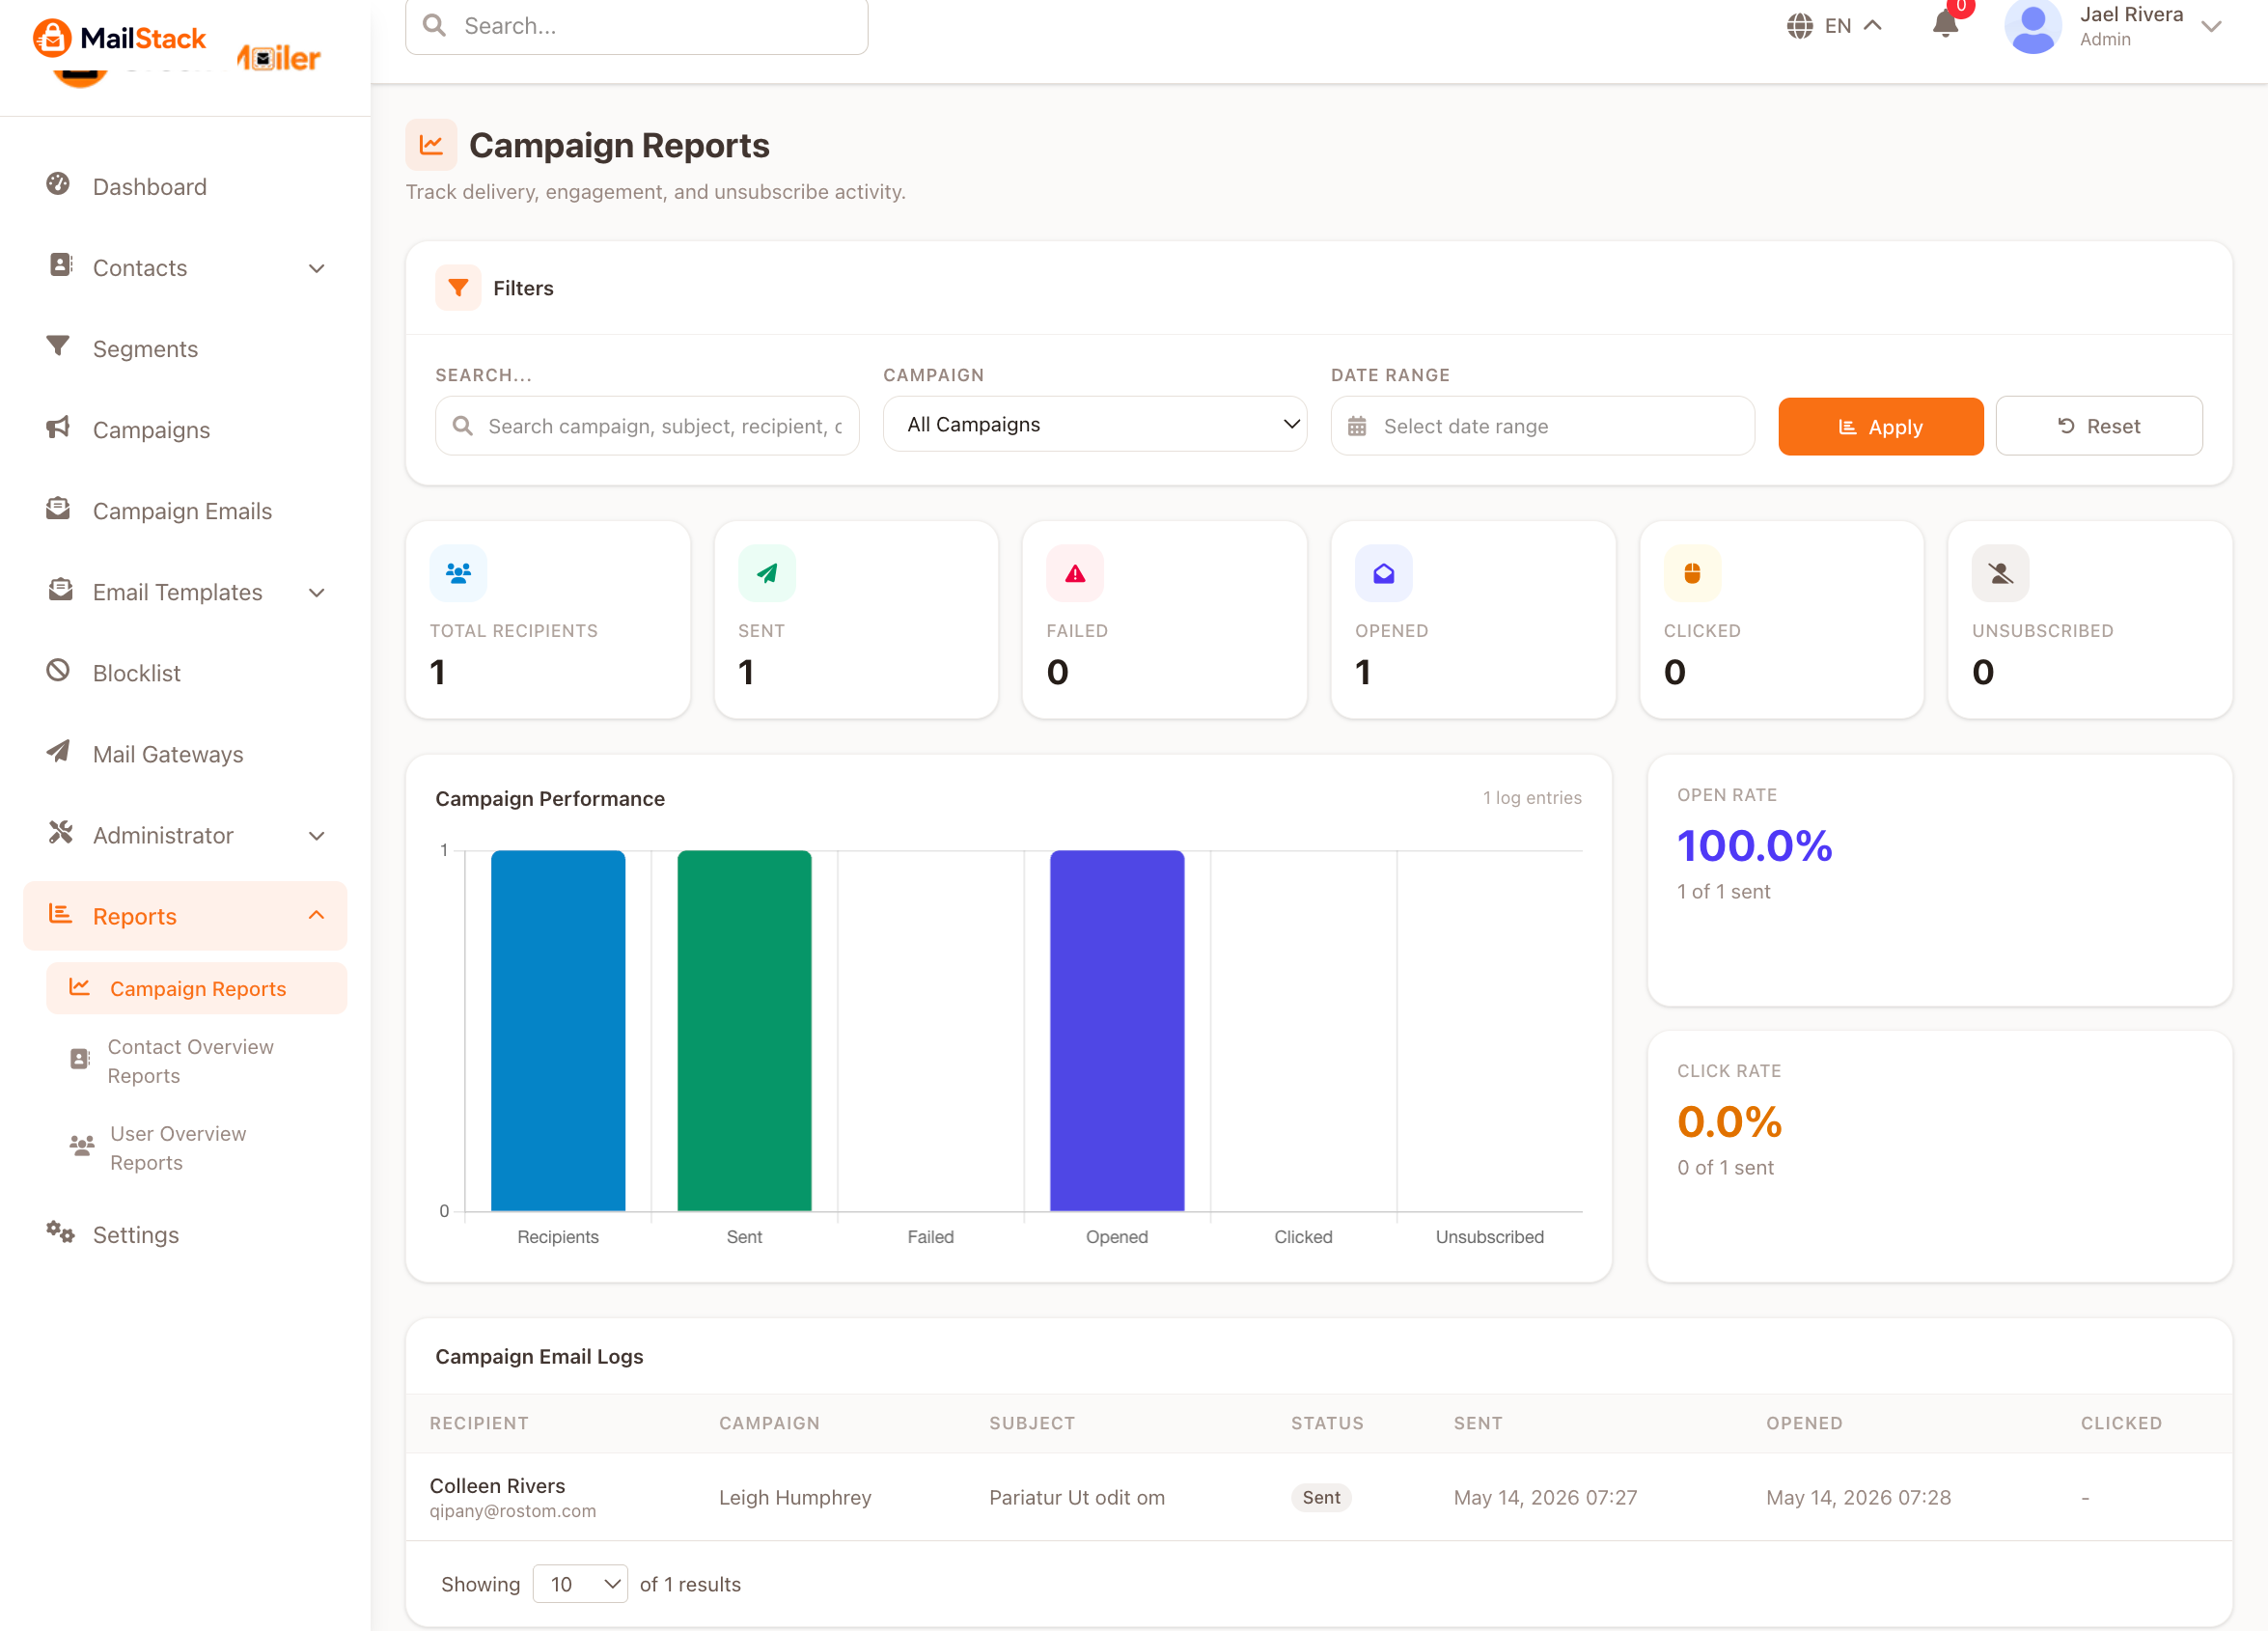
Track system activity such as login events, content updates, campaign actions, and administrative changes. This improves traceability and team accountability.
Notifications
Receive in-app or system-level notifications related to campaign processing, operational changes, or other important events configured by the application.
Multi-language Support
MailStack supports multiple languages for localized administration and buyer deployments. Set the default language from the settings panel and manage translation files as required by your installation.
Recommended MailStack Flutter Companion App Scope
Position the mobile product as a companion app that requires a working MailStack Laravel backend. Its best use cases are mobile monitoring, quick actions, and audience management rather than full desktop parity.
Best Modules For v1 Mobile
- Authentication, profile, and logout-all
- Dashboard stats and recent campaign activity
- Contacts, groups, custom fields, and segments
- Campaign create, draft edit, schedule, test send, duplicate, cancel
- Templates, categories, preview, notifications, blocklist, language switching
Keep On The Web Backend
- Installer and first-time server setup
- Deep system settings and gateway administration
- Full role and permission management
- Large export and PDF workflows
- Full parity for the rich HTML email builder
7. REST API Documentation
Authentication
The API uses Laravel Sanctum token authentication. Log in with valid credentials, receive a token, and send it with every protected request.
Authorization: Bearer YOUR_ACCESS_TOKEN
Accept: application/json
Base URL
Use your own domain in production. A standard API base URL looks like this:
https://yourdomain.com/apiCompanion app model: the MailStack Flutter app should be documented and sold as a companion product that requires this Laravel backend. The strongest mobile flows are authentication, dashboard monitoring, contacts, segments, campaigns, analytics, templates, notifications, blocklist, and localization.
Endpoint Groups
| Method | Path | Description |
|---|---|---|
| GET | /basic-info | Public application branding and basic configuration for mobile startup screens. |
| GET | /categories | List template categories available to web and mobile clients. |
| GET | /languages | List available languages for localized companion-app rendering. |
| POST | /login | Authenticate a user and return a Sanctum bearer token. |
| POST | /register | Register a customer-facing API user when self-service registration is enabled. |
| POST | /forgot-password | Start password reset for web or mobile users. |
| GET | /me | Return the authenticated user summary. |
| POST | /logout-all | Invalidate all tokens for the current account. |
| GET | /dashboard/stats | Dashboard totals and high-level activity for the companion app home screen. |
| GET | /lookups | Lookup payloads for statuses, selectors, and mobile form builders. |
| GET|PUT|PATCH | /profile | View and update the authenticated user profile. |
| GET|POST|PUT|DELETE | /contacts | Contact CRUD with search, filters, custom attributes, and group assignment. |
| POST | /contacts/import | Upload and import contacts when the mobile flow needs import status support. |
| GET|POST|PUT|DELETE | /groups | Contact-group CRUD for audience organization. |
| GET|POST|PUT|DELETE | /contact-fields | Manage dynamic contact fields used by forms and segmentation. |
| GET|POST|PUT|DELETE | /segments | Segment CRUD for rule-based audiences. |
| GET | /segments/{segment}/contacts | Preview the contacts matched by a dynamic segment. |
| GET|POST|PUT|DELETE | /email-templates | Template CRUD for reusable campaign content. |
| GET | /email-templates/{template}/preview | Preview a template before campaign use or mobile review. |
| GET|POST|PUT|DELETE | /campaigns | Campaign CRUD with draft, scheduled, and delivery states. |
| POST | /campaigns/test-send | Send a test email for campaign review from mobile or web. |
| POST | /campaigns/{campaign}/cancel | Cancel a scheduled or queued campaign. |
| POST | /campaigns/{campaign}/duplicate | Duplicate an existing campaign into a new draft. |
| GET | /campaigns/{campaign}/analytics | Return sent, opened, clicked, failed, open-rate, and CTR metrics. |
| GET | /campaigns/{campaign}/emails | Return delivery-level email records for a campaign. |
| GET|POST|PUT|DELETE | /mail-gateways | Gateway CRUD for backend administration and limited mobile visibility. |
| POST | /mail-gateways/{mail_gateway}/test | Send a gateway-level test email. |
| GET | /notifications | List in-app notifications for the authenticated user. |
| GET | /notifications/unread-count | Fetch unread notification counts for mobile badges. |
| PATCH | /notifications/{id}/read | Mark a single notification as read. |
| POST | /notifications/mark-all-read | Mark all notifications as read. |
| GET|POST|DELETE | /blocklist/emails | Manage blocked email addresses. |
| GET|POST|DELETE | /blocklist/domains | Manage blocked domains. |
Example: Login
POST /api/loginRequest body:
{
  "email": "[email protected]",
  "password": "secret-password",
  "device_name": "postman"
}
Successful response:
{
  "message": "Login successful",
  "token": "1|sanctum_plain_text_token",
  "user": {
    "id": 1,
    "name": "Admin User",
    "email": "[email protected]"
  }
}
Example: List Contacts
GET /api/contacts?page=1&per_page=20&search=johnExample response:
{
  "data": [
    {
      "id": 12,
      "name": "John Carter",
      "email": "[email protected]",
      "status": "subscribed"
    }
  ],
  "links": {
    "next": null,
    "prev": null
  },
  "meta": {
    "current_page": 1,
    "per_page": 20,
    "total": 1
  }
}
Example: Create Campaign
POST /api/campaignsRequest body:
{
  "name": "May Product Launch",
  "subject": "Introducing our latest update",
  "template_id": 3,
  "mail_gateway_id": 2,
  "group_ids": [1, 4],
  "segment_ids": [2],
  "from_name": "MailStack Team",
  "from_email": "[email protected]",
  "content": "<h1>Hello</h1><p>Campaign body here.</p>"
}
Example response:
{
  "message": "Campaign created successfully",
  "data": {
    "id": 25,
    "name": "May Product Launch",
    "status": "draft"
  }
}
Example: Send Test Email
POST /api/campaigns/test-sendRequest body:
{
  "test_email": "[email protected]",
  "subject": "Preview: May Product Launch",
  "from_name": "MailStack Team",
  "from_email": "[email protected]",
  "email_template_id": 3,
  "mail_gateway_id": 2
}
Example response:
{
  "message": "Test email sent successfully."
}8. Mail Gateway Setup
Warning: Before using any gateway for a live campaign, always send a test email and confirm that the credentials, sender identity, and delivery settings are working correctly.
You can add multiple mail gateways from the admin panel and choose the correct gateway when preparing campaigns.
- Log in to the admin panel.
- Open Mail Gateways from the sidebar menu.
- Click Add New Gateway.
- Select the gateway type.
- Enter the required credentials.
- Save the gateway and run a test send before using it in a live campaign.
SMTP
- Gateway name
- SMTP host
- SMTP port
- Encryption: TLS / SSL
- Username and password
- From name and from email
Mailgun
- Gateway name
- Mailgun domain
- API key
- Endpoint / region if applicable
- From name and from email
Amazon SES
- Gateway name
- AWS access key ID
- AWS secret access key
- AWS default region
- Verified sender email or domain
9. Role & Permission System
MailStack uses a role-based permission system powered by Spatie Permissions. Roles collect one or more permissions, and users inherit those permissions when a role is assigned.
How Roles Work
- • Permissions define individual abilities such as creating campaigns, editing contacts, or viewing logs.
- • Roles group permissions into reusable job-based access profiles.
- • Users receive access by being assigned one or more roles.
Typical Roles
- • Super Admin
- • Marketing Manager
- • Content Editor
- • Read-Only Auditor
Creating a Custom Role
- Go to Roles & Permissions in the admin panel.
- Create a new role and enter a descriptive name.
- Select the permissions that role should have.
- Save the role.
- Open the user management screen and assign the new role to one or more users.
- Log in with a test account to verify that access is limited correctly.
10. Upgrading
When a new version is released, apply the update carefully to avoid overwriting your live configuration or uploaded content.
- Create a full backup of files and database before starting.
- Read the release notes and changelog included with the update package.
- Upload the new files, replacing only the application files that belong to the product update.
- Do not overwrite your existing
.envfile. - Run dependency updates if the release notes require them:
composer install --optimize-autoloader --no-dev
npm install
npm run build- Run database migrations:
php artisan migrate- Clear and rebuild caches:
php artisan optimize:clear
php artisan config:cache
php artisan route:cache
php artisan view:cache11. FAQ / Troubleshooting
Queue is not running
Symptoms: campaigns remain pending, test emails never arrive, background tasks do not finish.
- Confirm
QUEUE_CONNECTIONis set correctly in.env. - Run
php artisan queue:workmanually to verify job processing. - On VPS, confirm Supervisor is installed and the worker process is active.
- On shared hosting, use cron-based processing if long-running workers are not supported.
Mail is not sending
- Verify the selected mail gateway credentials.
- Send a test email from the gateway settings screen.
- Check sender email verification requirements for Mailgun or Amazon SES.
- Review
storage/logs/laravel.logfor connection or authentication errors. - Confirm your hosting provider allows outbound SMTP connections if you use SMTP.
Permission denied or 403 errors
- Check that the logged-in user has the required role or permission.
- Clear cached permissions if you changed role rules recently.
- Verify folder permissions on
storageandbootstrap/cache.
php artisan optimize:clear12. Support
Support is provided for verified buyers according to the item support policy. Keep your purchase code available when requesting assistance.
How to Get Help
Contact support through your CodeCanyon buyer account, item support tab, or the official support channel provided by the author.
Typical Response Time
Most support requests are answered within 1-2 business days, depending on workload and timezone overlap.
What's Included
Installation guidance, bug clarification, and help with product-related issues in the original source. Custom development and third-party server administration are usually not included.